

A well-executed media wall installation enhances the aesthetics and functionality of any space, whether in a corporate environment, home theater, or retail setting. Choosing the right materials and tools is crucial for ensuring durability, ease of installation, and optimal performance. This guide explores the best materials and tools required for a successful media wall installation, offering insights into each essential component.
Essential Materials for Media Wall Installation
Wall Mounting Structure
A sturdy wall mounting structure is the foundation of a successful media wall installation. Depending on the type of wall and display weight, installers can choose from:
- Metal Stud Frames – Lightweight, durable, and suitable for commercial spaces.
- Wooden Frames – Ideal for residential media walls, providing flexibility in design.
- Reinforced Drywall – A cost-effective option that requires additional support for heavier displays.
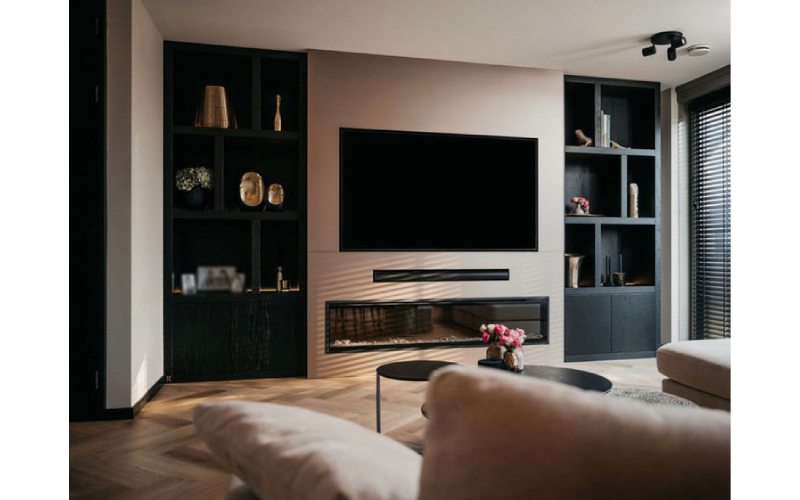
Display Panels
The type of display used significantly impacts the visual experience. Options include:
- LED Panels – Provide high brightness, excellent color accuracy, and seamless visuals.
- LCD Screens – Suitable for budget-conscious installations with crisp image quality.
- Projector Screens – Used for large-scale media walls, requiring minimal structural support.
Power And Cable Management
An organized cable management system ensures a clean and safe media wall installation. Essential components include:
- Cable Raceways – Conceal and protect cables from damage.
- Power Distribution Units (PDU) – Prevent electrical overloads and manage power flow efficiently.
- HDMI and Ethernet Cables – Ensure high-quality transmission of video and data signals.
Mounting Brackets And Supports
Choosing the right mounting brackets is crucial for a secure and stable installation. Options include:
- Fixed Mounts – Hold displays in a static position for a streamlined look.
- Tilting Mounts – Allow angle adjustments to reduce glare.
- Articulating Mounts – Provide flexibility with extendable and rotatable arms.
Best Tools for Media Wall Installation
Measuring And Marking Tools
Precision is key in a media wall installation. The following tools help ensure accurate placement:
- Laser Level – Projects straight lines to align display panels perfectly.
- Measuring Tape – Essential for determining distances and spacing.
- Pencil and Chalk Line – Mark installation points without damaging walls.
Drilling And Fastening Tools
To securely mount the structure, proper drilling and fastening tools are required:
- Power Drill – Drills holes for screws and anchors quickly and efficiently.
- Screwdrivers and Impact Drivers – Essential for securing brackets and mounts.
- Wall Anchors and Screws – Provide strong support for the media wall frame.
Cable Management Tools
Proper cable routing ensures a clean and functional setup. Key tools include:
- Wire Cutters and Strippers – Trim cables to the appropriate length.
- Cable Ties and Velcro Straps – Organize and secure cables neatly.
- Fish Tape – Guides cables through walls without causing damage.
Safety Equipment
Safety is paramount when handling heavy displays and electrical wiring. Recommended gear includes:
- Protective Gloves – Prevent hand injuries during installation.
- Safety Glasses – Shield eyes from dust and debris.
- Ladders and Scaffolding – Provide safe access to elevated installation points.
Step-by-Step Media Wall Installation Process
Planning And Design
- Measure the wall and determine the best layout.
- Choose the appropriate display type and mounting solution.
- Ensure the wall structure can support the total weight of the installation.
Preparing The Wall
- Mark the installation points using a laser level.
- Install wall anchors if needed for added support.
- Route cables through designated channels for a clutter-free setup.
Installing The Mounting Structure
- Secure the metal or wooden frame to the wall.
- Attach mounting brackets according to the display panel specifications.
Mounting The Displays
- Carefully lift and secure each display panel onto the mounting brackets.
- Adjust alignment and ensure all panels are level.
- Connect power and data cables, keeping them neatly arranged.
Final Adjustments And Testing
- Perform a system check to confirm all displays function correctly.
- Make final adjustments to brightness, contrast, and color settings.
- Ensure proper ventilation to prevent overheating of electronic components.
Tips for a Professional and Long-Lasting Media Wall Installation
Choose High-Quality Materials
Investing in durable materials reduces maintenance costs and ensures long-term reliability.
Maintain Proper Ventilation
Adequate airflow prevents overheating and extends the lifespan of the display panels.
Hide Cables Efficiently
Well-organized cables enhance the aesthetic appeal and prevent potential hazards.
Regular Maintenance Checks
Periodic inspections ensure all components remain secure and in optimal working condition.
Conclusion
A successful media wall installation requires the right combination of materials and tools. From sturdy mounting structures to precision measuring instruments, each component plays a crucial role in achieving a seamless, professional finish. By following the recommended steps and best practices, installers can create an impressive media wall that enhances visual engagement and functionality in any space.